Tutorial
How to use LeadRM
This page walks you through the app. Start at the top if you are new. Each lesson uses the labels you will see on screen.
Watch the walkthrough, then follow the steps below.
1. Create your account
You need an account before the lead list appears. A new workspace starts on the Free plan.
- Go to https://leadrm.app/app.
- Click Sign up. Enter Name, Email, Password, and Confirm password, then click Create account.
- Or click Continue with Google and pick the Google account you want to use.
- Next time, stay on the sign-in form and click Sign in.
Forgot the password? On the sign-in form, click Forgot password? under the Password field. Confirm the email and click Send reset link. Open the email, set a new password, then click Back to sign in.
Read the two credit balances
The header shows two numbers, separated by a bar: Monthly and Top-up. Monthly is the renewing pool for your plan. Free includes 20 monthly credits. That pool refills on the 1st (America/Los_Angeles). Credits you do not spend this month do not roll over. Top-up is an independent pool for one-time purchases. A new account can also show 10 starter credits in that Top-up number. Those credits roll over, they do not expire, and they stay on the 1st and if you later cancel a subscription. When a search spends credits, LeadRM uses the monthly pool first, then the top-up pool.
2. Find leads
The green Find Leads button is in the header. If both balances are empty and you do not have your own directory key, that button opens Buy Credits instead of the search form.
- Click Find Leads. The form is titled Find leads.
- Type a Niche / business type. The placeholder changes with the source you pick, such as “House cleaning services” or “CRM software”.
- Fill Location when the label does not say optional. For a local search, use a city, such as Los Angeles, CA. Separate several cities with semicolons — Dallas, TX; Austin, TX; Houston, TX — or click the upload link to load a city list from a .txt, .csv, or .json file. A search can cover up to 500 cities.
- Open Data Source and pick one directory. You search one source at a time.
- Campaign tag is optional. Type a name if you want these results grouped, or leave the placeholder “Optional campaign”.
- Set Max businesses to process to a whole number from 1 to 500. Start smaller while you learn the results.
- Read the cost line under that field: “Cost: 1 credit per business processed.” Your own keys, covered in the last lesson, can zero that charge. The search does not look up or verify emails.
- Click Find leads at the bottom of the form. The window closes as soon as the search starts, and progress moves to the yellow banner.
Pick a data source
Use Google Maps or Yelp when you want local businesses. Pair a niche with a city. Location is required for both.
Use Trustpilot, Google Play Store (App Developers), Product Hunt, or G2.com when you want software or products. Trustpilot still requires Location (the placeholder is United States). The other three label the field Location (optional). Leave it blank or type Worldwide.
What gets saved
A search saves the businesses returned, up to Max businesses to process, including rows with a missing address or a missing owner name. Those fields can be blank. Address, City, State, and Zip Code are saved when the result includes them, and each can be shown or hidden from Columns. A blank email is labeled No Email, not Unverified. An email that is present and has not been checked is Unverified.
Every business the directory returns is saved — company, phone, website, category, and location — even when the email is blank. Nothing is dropped for a missing field. Processing a business still uses a credit unless your own directory key covers that phase.
When the Location field lists several cities, LeadRM searches them one at a time until the shared max is reached. A business already returned within the last 180 days can come from the saved-results cache instead of a fresh directory call, which makes repeat searches faster.
Read the progress banner
The Find leads window closes itself once the search begins. A yellow banner appears under the header and says Finding leads… while the search runs, with combined totals across every city and the name of the city being searched now. You can click Stop if you want to halt it. When it finishes, the banner reads Search complete, then tells you how many businesses were processed, how many were saved, how many emails were found, and how many credits were used for the whole run. If your keys cover every charged phase, that last part can read Used 0 credits (BYOK Active).
New rows land on Cold Leads. A business already in your list is not saved again. If the workspace is already at its storage cap, the save stops with “Lead storage limit reached. Please upgrade your plan to save more leads.”
3. Work the list
After a search, stay on Cold Leads. The other tabs are Opportunities, Customers, and Follow-Ups. Follow-Ups collects opportunity rows that were never contacted, have activity older than 4 days, or have a scheduled follow-up that already passed.
- On Cold Leads, filter with All, Verified OK, Catch-All, Invalid, or Unverified.
- Use the search box (“Search emails, companies, tags...”) to narrow the page. Click a column header to sort the table by that column.
- Click a row to open it. Use Move Stage to change Raw, Verified, Outreach, Follow-up, Negotiation, or Customer.
- In the open lead, pick Quick Note, Call, Support Ticket, or Meeting, write what happened, and click Save Note. Draft with AI writes text you can copy. LeadRM does not send that message.
- The table can show Scraped by, the person who found that lead. People on the same workspace share one lead list, so a member sees the owner’s leads.
- If a saved row still has a blank email, select it and click Find Email (AI). That search costs 1 credit when an email is found and saved. A search that finds nothing is not charged. A failed search is not charged. It does not verify the address. When the run finishes, a summary window shows how many emails were found, saved, and failed, and how many credits were used.
- The ban icon on a row is Globally unsubscribe. Confirm it if that address should be left out of later exports.
Verify addresses already in the list
Verify Unchecked Emails is on Cold Leads. It is a separate action from Find Leads. It checks cold-stage addresses that do not have a result yet, and it charges 1 credit for each check that finishes when LeadRM’s own keys are in use. Click Cancel on the progress panel if you want to stop; emails already checked stay checked.
Enrich decision makers
Enrich is separate from Find Leads and from Find Email (AI). It runs from the leads table on a batch you select.
- Select at least 20 leads, then click Enrich. Fewer than 20 shows: “Please select at least 20 leads to run a batch enrichment.”
- The hint next to Enrich reads “Cost: 10 credits per successful contact found.” The confirm step estimates up to 10 credits per selected lead.
- One batch is sent together. The search looks for Owner, Business Owner, Principal, Founder, Co-Founder, President, CEO, Managing Partner, and Managing Director before anyone else. Enrich does not run as part of Find Leads.
- 10 credits when a decision-maker contact is found. 2 credits when only a business email and/or social profile is found. No charge when nothing is found.
- The workspace must have enough credits for the whole selection, 10 credits times the number of leads, before the batch starts. If it does not, you are asked to upgrade or buy credits.
The company Email and Phone columns stay the scraped business contact. Decision-maker email and phone are separate columns, DM Email and DM Phone. Other columns are Decision Maker (name and title), Company Size, LinkedIn (company and person), Enrichment Status, Address, City, State, and Zip Code. Show or hide them from Columns.
Open a lead and the drawer section is Executive & Company Intelligence. It shows the name, title, LinkedIn, company LinkedIn, company size, and the decision-maker email and phone.
Tag, campaign, and export
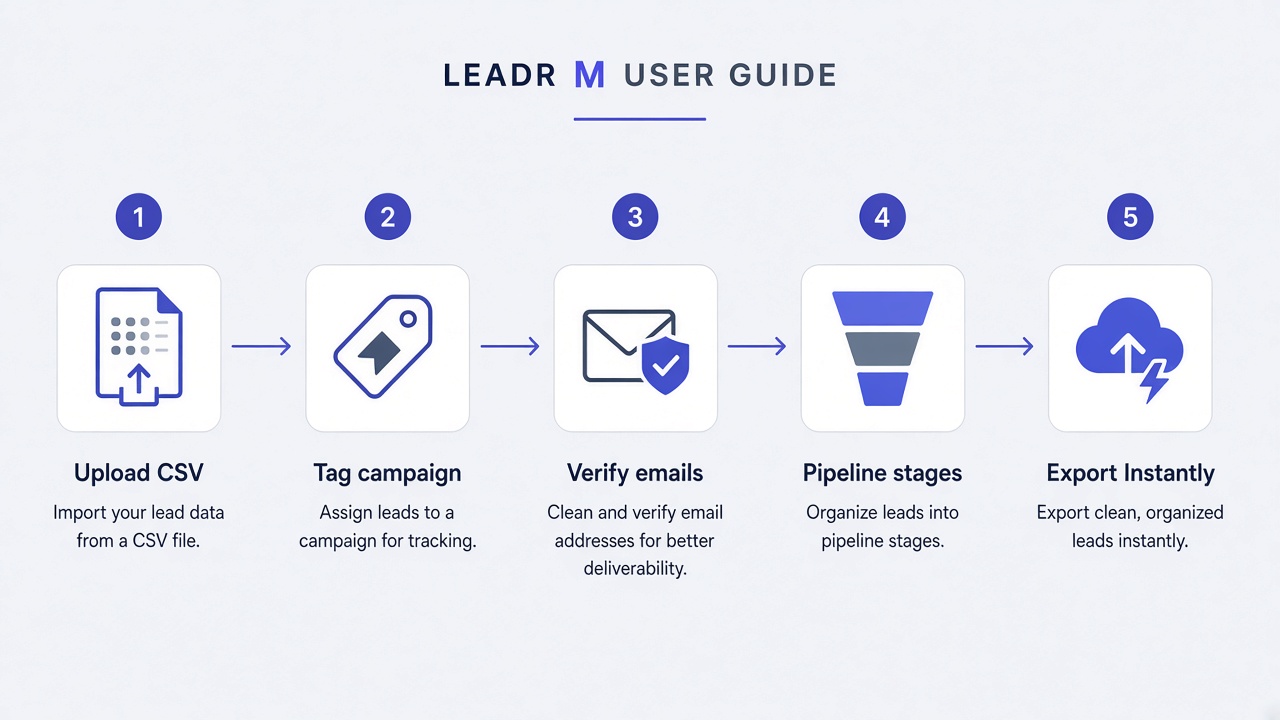
- Check the rows you want. Click Tag Selected, choose a tag or Create new tag, then Apply.
- Click Set Campaign to put the checked rows on a campaign.
- Under Campaign / List, pick that campaign if you want to narrow the table. Export uses the checked rows, including when the filter is All campaigns.
- Open Export and choose Export Visible Columns (CSV) or Export All Data (CSV). Chunks of 50 and Chunks of 100 use that same choice. The file includes every checked lead, in the order you selected them, even with no email or an unverified, invalid, or catch-all address. Empty fields stay blank. Verified Email is filled only when verification is OK.
The yellow + button is a second way in. Its menu has Find leads, Import CSV, Add Single Lead, Manage Campaigns, and Manage Tags. Import CSV is for a file you already have. Map the columns, name the campaign, and the rows join the same list.
4. Credits and plans
Click + Buy Credits. The window is titled Plans. Two tabs sit at the top: Plans and Credit Top-ups.
- On Plans, choose Monthly, Yearly, or Lifetime. Monthly and Yearly are subscriptions. Lifetime is the LeadRM Lifetime Deal, a one-time payment on Growth, Pro, and Agency. Small Pack and Starter Pack do not offer lifetime, so that card says lifetime is not available.
- Read the card. It lists the monthly credit allowance, lead storage, and seats. Click Subscribe or Buy lifetime.
- On Credit Top-ups, buy a one-time add-on if you run out before the month ends. The button is Buy top-up. Those credits land in the Top-up balance. Pro Pack and Agency Pack do not sell top-ups.
- The Promo code field is on this window. The placeholder says Optional. Leave it blank if you do not have a code. Stripe Checkout has a code field as well. A code can apply to monthly, yearly, top-ups, and website lifetime. Codes do not stack, and an account can use one once.
- After payment confirms, the header balances update. Click Billing in the header for receipts.
Monthly allowances are Free 20, Small 100, Starter 300, Growth 1,000, Pro 3,000, and Agency 8,000. Prices on the cards are Small $5 per month or $49 per year, with a $6 top-up; Starter $12 or $99, with a $13 top-up; Growth $29, $199 per year, or $498 lifetime, with a $31 top-up; Pro $69, $499, or $1,198 lifetime; Agency $138, $799, or $1,838 lifetime. Storage and seats are 5,000 and 1 on Free, 25,000 and 1 on Small, 50,000 and 1 on Starter, 500,000 and 3 on Growth, 2,000,000 and 5 on Pro, and unlimited storage and 10 seats on Agency.
There is no long-term lock-in on monthly or yearly. Canceling a subscription returns the workspace to Free. The Top-up balance is not wiped. On a team workspace, monthly plan credits are one shared pool. Purchased top-up credits stay with the person who bought them. The LeadRM Lifetime Deal already includes that plan’s monthly credit allowance, which still resets on the 1st. The deal is offered on Growth, Pro, and Agency.
5. Open Settings
Click Settings in the header. Three tabs sit across the top: Account, Team, and API Keys.
- Account is your display name, email, and password. You can also delete the account from this tab.
- Team shows seats in use and the monthly credit count. The owner fills Invite by email and clicks Invite. People on the same workspace share one lead list, and a member sees the owner’s leads. Revoking a seat does not delete that person’s leads. Members share the monthly pool and the plan’s storage cap. Purchased top-up credits stay with the person who bought them. If the plan has no open seat, the page says “Seat limit reached for your current plan.”
- The lifetime offer is the LeadRM Lifetime Deal on Growth, Pro, and Agency. Stay on Team, paste the code into License key, and click Apply license. The same form is at https://leadrm.app/redeem. That page does not open Stripe Checkout. The first tier becomes Growth, the second becomes Pro, and the third becomes Agency. The deal includes the plan’s monthly allowance. You do not also subscribe.
- API Keys is the next lesson. Leave it until you are on Pro or Agency.
6. Bring your own keys
API keys are for the Pro Pack and the Agency Pack. Open Settings, then API Keys. Only the workspace owner can save them.
- Enter the keys you have: Outscraper API Key, Scrape.do API Key, MillionVerifier API Key, and Gemini API Key.
- Click Save API keys. Saved keys replace LeadRM’s keys for those services and bypass LeadRM credit usage for extractions and verifications.
- An Outscraper key zeros extraction charges. A Scrape.do key, a MillionVerifier key, or both, zero the Find leads contact lookup and verification charges. The Gemini key is for Draft with AI, which writes message text you can copy on your own Google AI Studio account. Find Email (AI) uses LeadRM’s built-in AI, so its 1-credit price applies either way. Enrich on the leads table is the batch in lesson 3.
- Run Find leads again. If every charged phase used your key, the banner can say Used 0 credits (BYOK Active).
Every other plan sees a lock and the message “API Keys / BYOK requires the Pro or Agency Pack.” If you later move to a plan without API keys, LeadRM ignores the saved keys and charges credits again.
7. Connect AI agents
LeadRM exposes your lead list to AI assistants — Claude Desktop, Cursor, Windsurf, GitHub Copilot, the Gemini CLI, ChatGPT actions, and custom CrewAI or LangChain pipelines. See the AI Agents page for every integration.
- Open Settings, then Integrations, and find MCP server access. Click Generate key and copy the
lrmk_…key — it is shown once and stored only as a hash. - For Claude, Cursor, Windsurf, Copilot, or Gemini, add the MCP server to your client config and set
LEADRM_API_KEYto that key. The server runs withnpx -y leadrm-mcp. Your agent gets tools to query leads, start a directory scrape, and enrich a batch. - For ChatGPT actions, CrewAI, LangChain, or a plain script, call
GET https://leadrm.app/api/v1/agent/leadswith the key as a Bearer token. Filter withindustry,city, andhas_email. The OpenAPI schema is at leadrm.app/openapi.json. - Agents see only your own workspace leads, and credits, BYOK, and rate limits work exactly as they do in the app. Revoking the key in Settings cuts every agent using it.
Where to go next
Run the steps above in the app. Short questions live on the FAQ. A compact fact sheet for assistants is the AI guide.
Open the app